 es et italiennes.
 Elles ont trouvé leurs origines dans les quartiers immigrants de New York dès le début de XXième Siècle.
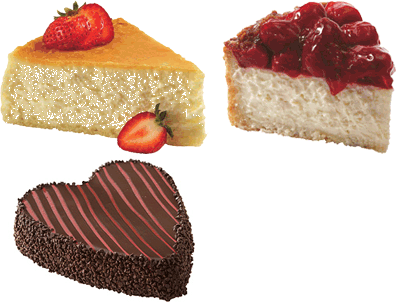
Les cheesecake font partis des desserts traditionnels américains que l'on trouve à NY. Il est incontournable lorsque l'on est à Big Apple.
Il s'agit d'un gâteau au fromage blanc vraiment excellent lorsqu'il est réussi.
Ils existent plusieurs parfums également pour les cheesecake : nature, mangue ou coco, en passant par le beurre de cacahuètes et la banane et bien d'autres.
En général, on le mange vers 16h avec un thé ou un café et entre amis.
Les adresses à New York pour déguster de très bons cheesecake :
♥ New York Style Cheesecake à Times Square West 45th Street Bet. Broadway & 8th Avenue
♥ Eileen's Cheesecake 17 Cleveland Place
N'hésitez pas à nous communiquer vos bonnes adresses !
Et puis pour finir la véritable recette du cheesecake New Yorkais d'après le site marmiton.org :
Préparation : 10 mn
Cuisson : 40 mn
Ingrédients (pour 6 personnes) :
Fond du gâteau :
- 200 g de biscuits speculoos
- 80 g de beurre
Garniture :
- 1 kg de St moret (ou 3 boîtes "familiales")
- 150 g de sucre
- 2 oeufs
- 1 cuiller à café de vanille liquide
Préparation :
Préchauffer le four à 180°C (Th 6).
Passer les speculoos au mixer pour obtenir une poudre, puis les mélanger au beurre fondu. Tapisser le fond d'un moule à gâteau (anti-adhésif de préférence) avec le mélange, bien tasser, et faire cuire 10 mn.
Mélanger le St moret avec le sucre, les oeufs et la vanille (au mixer c'est mieux, afin d'obtenir une préparation presque liquide). Verser le mélange sur le fond de spéculoos cuit.
Mettre au four 25 à 35 mn selon la puissance du four (moins cela cuit, plus cela sera crémeux...).
Laisser refroidir puis mettre au réfrigérateur pendant 4 h minimum.
La recette vue aussi par 2Bleue sur le site américain recipezaar.com :
Ingredients
- 40 ounces cream cheese, softened (five 8oz pkgs)
- 1 1/2 cups sugar
- 16 ounces sour cream
- 2 large eggs
- 1 tablespoon lemon juice
- 1 teaspoon vanilla
- 1/2 teaspoon salt
- Preheat the oven to 375°F and prep a large spring form pan as follows: Place a sheet of parchment paper over the inside bottom of the spring form pan, fit the rim and lock in place. Trim excess paper from the underside of the pan. Place a large sheet of heavy duty aluminum foil on counter. Place the locked pan in center and raise up the foil to top rim. Crinkle around the outer top of rim.
- Using some firm butter, fill in the inside lower rim of pan, using your finger to form a smooth lining. (like caulking a bathtub). Place in freezer while you make the batter.
- Beat cream cheese and sugar till smooth. Add sour cream, then eggs (one at a time).
- Add remaining ingredients. Mix on medium speed until well incorporated (about three minutes), scraping down sides of bowl several times while mixing to prevent lumps).
- Remove the spring form pan from freezer. Place pan onto a dishcloth onto counter and pour batter into pan. (So it's not 'loud' when you temp it).
- With your palms around the outside rim of the pan, GENTLY lift and drop down pan onto the towel. Rotate an inch or so and repeat a few times to raise and release air bubbles from batter. (this will help keep your cheesecake from cracking).
- Set the spring form pan into a water bath. (A water bath is a baking pan or heat proof container larger than your cake pan with about an inch or two of water above the bottom of the cake pan). This is for even cooking and to preserve moisture).
- Bake at 375°F for 30 minutes. WITHOUT opening oven door, reduce temperature to 250°F and continue to bake for an additional two hours or until center of cake registers 150F with a digital thermomete
- Remove from oven, water bath, and outer foil. DO NOT unlock the spring form pan! Place on cooling rack for 30-60 minutes.
- Loosen cake from sides by going between the cake and the pan with the edge of a knife. Refrigerate for at MINIMUM of four hours but overnight is best. (NOTE: If you are using a topping, you can place it onto the cake about 2 hours after refrigerating the cake)
- Unlock and remove the side of pan. For easier slicing, use dental floss. Taut between your hands, press down over cake, then let go of one end, and slide out from side. Rotate and repeat for desired amount of slices, thick or thin is up to you!


